
Typically, the Xpenology bootloader is installed on a USB drive. However, using a USB bootloader means you have to plug in the USB drive every time you boot your NAS, which can be inconvenient.
Since I’m using a TAOBAO NAS J1900 model that comes with a 16GB mSATA SSD attached to the motherboard, I decided to install the bootloader directly onto the mSATA SSD. This eliminates the need to repeatedly plug and unplug a USB drive.
TAOBAO NAS models originally come with the bootloader installed on the SSD, but if you want to reinstall it for a fresh start or reduce the hassle of booting a custom NAS, this guide might be helpful.
Note: Despite the advantages of installing the bootloader on an mSATA SSD, using a USB drive to create a boot disk has many benefits. Please proceed with caution and follow the instructions carefully.
Required Materials
1. Motherboard Capable of Installing an Internal SSD (mSATA)
If your motherboard only has an M.2 socket, use an adapter.
Although you could use a SATA SSD or HDD for booting, it’s not recommended due to the unnecessary waste of space. If internal SSD installation is not possible, it’s better to use a boot USB.
2. Low-Capacity Internal SSD
Low-capacity mSATA SSDs are cost-effective and suitable for booting, without worrying about significant wear and tear. If using an M.2 SSD, you might find it more complex and may prefer a boot USB.
3. A USB Drive of Suitable Capacity
To install the bootloader on the mSATA SSD, you need to create a WinPE boot USB to boot the NAS into WinPE for installation. One USB drive is sufficient since files on it can be individually executed after booting.
4. DSM Version and Matching Boot Image
Xpenology requires a boot image matching the DSM version you want to use. For example, I used DSM 918+ 6.2.3 with Jun’s Mod 1.04b, which includes additional drivers. Without these, the network won’t be recognized after upgrading DSM.
Download the desired DSM version from Synology’s Support Page.
5. OSFMount
Download from OSForensics. This program is needed to modify the boot image.
6. USB View
Download from Softpedia. This tool identifies the VID (idVendor) and PID (idProduct) of the boot disk, which are required to modify the boot image.
For SSD or HDD boot images, leave VID and PID fields blank.
7. Roadkil’s Disk Image
Download from Roadkil. Used to apply the boot image to the mSATA SSD after booting the NAS into WinPE.
8. WinPE Boot Image
WinPE boot images are usually custom-made, so I won’t provide a specific link. Make sure it includes network drivers.
9. Rufus
Download from Rufus. This tool is used to create the WinPE boot USB. The portable version is convenient.
Steps to Follow
1. Create a WinPE Boot USB
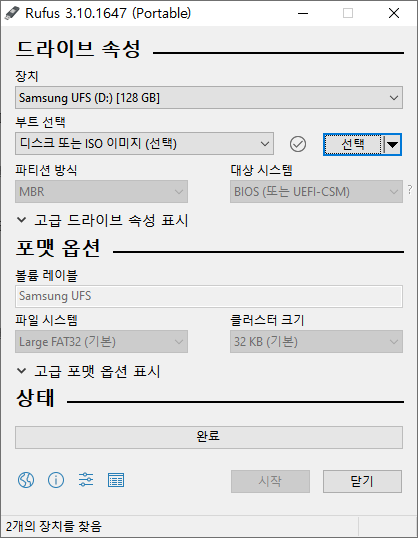
Select the USB drive, choose the WinPE boot image, and write it to the USB.
2. Add Diskimage and USBView to the Boot USB
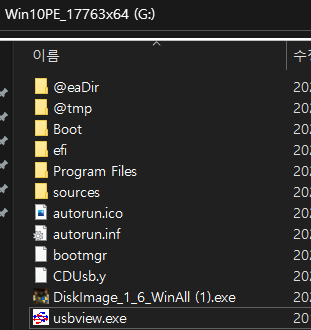
Simply copy these files to the USB drive.
3. Boot the Custom NAS into WinPE
Connect a monitor, keyboard, and mouse to your NAS. Insert the boot USB and repeatedly press F11 to boot into WinPE.
Press Win+R to open the Run dialog, type cmd to open the command prompt, and enter ipconfig /all to note down the MAC address (physical address).
Run USBView from the boot USB to identify the VID and PID of the mSATA SSD. It may be confusing to distinguish between USB and mSATA SSD, but if you use a branded USB drive, the brand name should appear alongside the VID, making it easier to identify.
4. Modify the Boot Image
After noting down the information, shut down the NAS, remove the USB drive, and insert it back into the computer.
Run OSFMount.
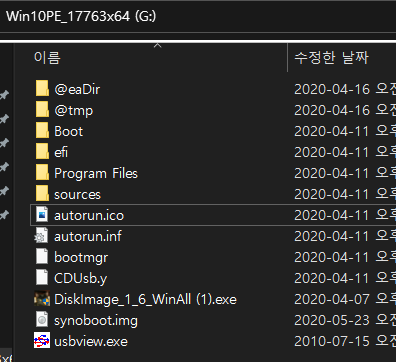
Click “Mount New,” select the Synology image file (synoboot.img), and click Next.
Select the 15MB partition and click Next.
Uncheck “Read-only drive” and click Mount.
Double-click the mounted entry in OSFMount.
Open the grub folder and then grub.cfg file with Notepad. Edit the file with the previously noted VID, PID, and MAC address (leave VID and PID blank if installing on SSD or HDD). Save the changes.
Go back to OSFMount, click “Dismount All & Exit.”
Copy the modified image file back to the boot USB.
5. Boot the Custom NAS into WinPE Again
Boot the NAS into WinPE again.
Open cmd, run diskpart, and then list disk to identify the storage device to install the bootloader.
Select the storage device with sel disk X (replace X with the appropriate number), then run clean. Be careful to select the correct disk to avoid erasing the boot USB.
Run Roadkil’s Disk Image from the boot USB.
Select the mSATA SSD and apply the modified boot image.
6. Set Up the NAS
Remove the USB drive, set up the NAS at its intended location, and boot it.
7. Configure the NAS
Visit http://find.synology.com/ or use Synology Assistant to perform the initial NAS setup.
During the setup, manually upload the DSM file, create an administrator account, set the update setting to notify for installation, and skip the QuickConnect setup.
Conclusion
Now, the Xpenology bootloader is installed on the mSATA SSD, so you don’t need to plug and unplug the USB drive each time you reboot. Feel free to power cycle the NAS as needed.
In the next post, I will cover the basic initial settings for Xpenology.