Synology has a very convenient feature that automatically issues Let’s Encrypt certificates. This handy feature is also available on Xpenology. Let’s Encrypt’s free certificates need to be renewed every three months, and this feature allows one-click renewals, making it extremely useful and convenient for those running a web server on Xpenology.
However, due to the instability of Xpenology, the issuance process often fails with errors. Many people have experienced frustration with this, and I, too, faced significant issues. Eventually, I resorted to manually obtaining certificates for each subdomain from a certificate issuing site.
Recently, the site I used for manual issuance limited the number of subdomain certificates to three, prompting me to resolve the certificate issuance issue on Synology itself.
Previously, I tried all the internet-suggested methods like disabling the firewall, opening port 80, and stopping other packages using port 80, but none worked.
Finally, I determined that the only solution was to update the DSM version.
I was using version 918+ 6.2.1 update 6, which had a bootloader that didn’t resolve the LAN card recognition issue for version 6.2.3, preventing manual updates. So, I backed up everything using Hyper Backup, wiped the hard drive, and installed Jun’s 1.04b boot image for 6.2.3. After the update, the certificate issuance worked perfectly without any issues related to ports or package conflicts.
After upgrading, if you try to restore without wiping the hard drive, Xpenology might not be recognized on the network due to errors. Therefore, I recommend backing up everything using Hyper Backup, wiping the system, and then restoring it for a smoother process.
You can easily find the problem-solving version of the image by googling the keyword ‘1.04b 6.2.3’ and referring to Redmilk’s post. Here’s how to apply the new boot image
Refer to the link above.
Now that the issue is resolved, let me introduce how to issue a Let’s Encrypt certificate.
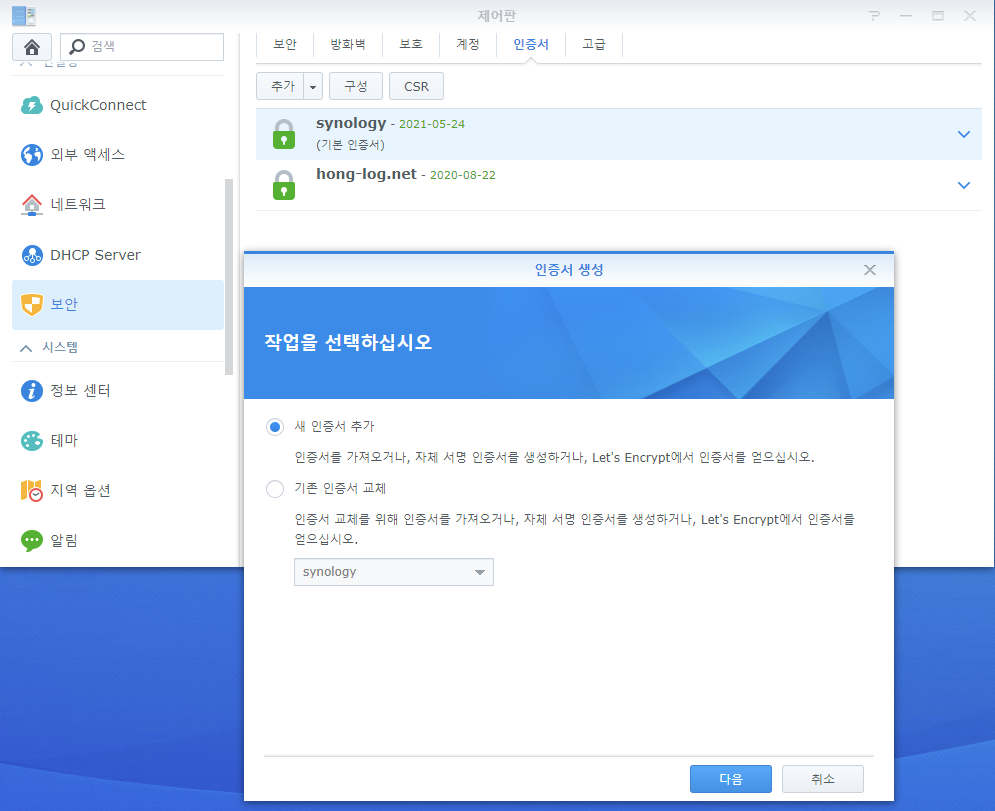
Go to the Control Panel and navigate to the Security tab. Then, go to Certificates and click Add. A window like the one above will appear.
Check ‘Add a new certificate’ and click Next.
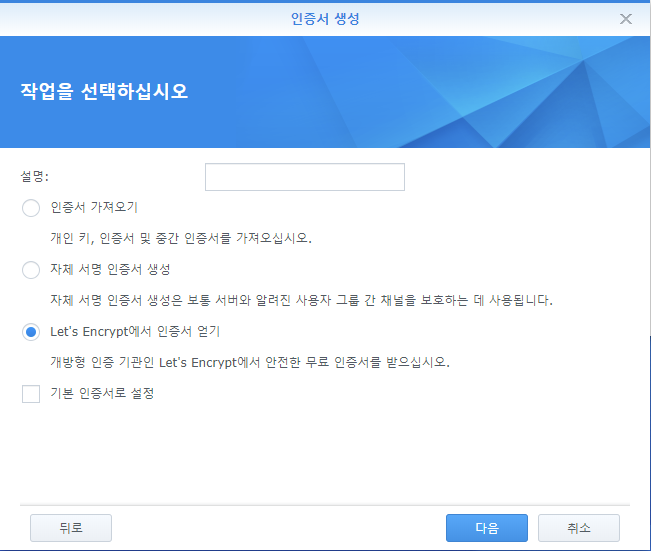
Click ‘Get a certificate from Let’s Encrypt’.
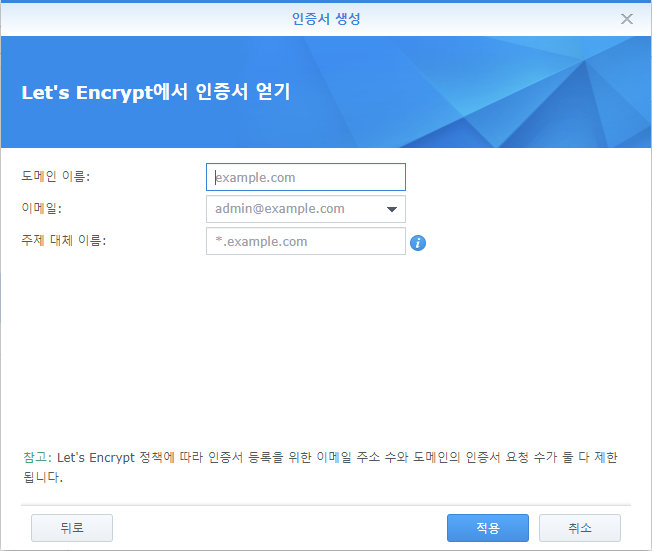
Enter the domain you own (e.g., hong-log.net) and your email address. In the Subject Alternative Name field, list your subdomains in the format ‘www.hong-log.net;blog.hong-log.net’. Separate each subdomain with a semicolon (‘ ; ‘) and list them all.
Then click Apply, and you’re done!
Since Let’s Encrypt is based in the United States, if you still can’t issue the certificate after updating, try disabling the firewall and attempting the issuance again.
I only have the firewall open for South Korea and the United States.
Now, let’s talk about renewal.
As everyone knows, Let’s Encrypt’s free certificates need to be renewed every three months. While other tools can facilitate easy renewal, if Synology’s automatic renewal feature encounters errors, you’ll have to issue certificates manually. This involves obtaining and applying certificates for each subdomain separately, which is quite a hassle to repeat every three months.
However, using Synology’s built-in functionality makes reissuing certificates easy and convenient.
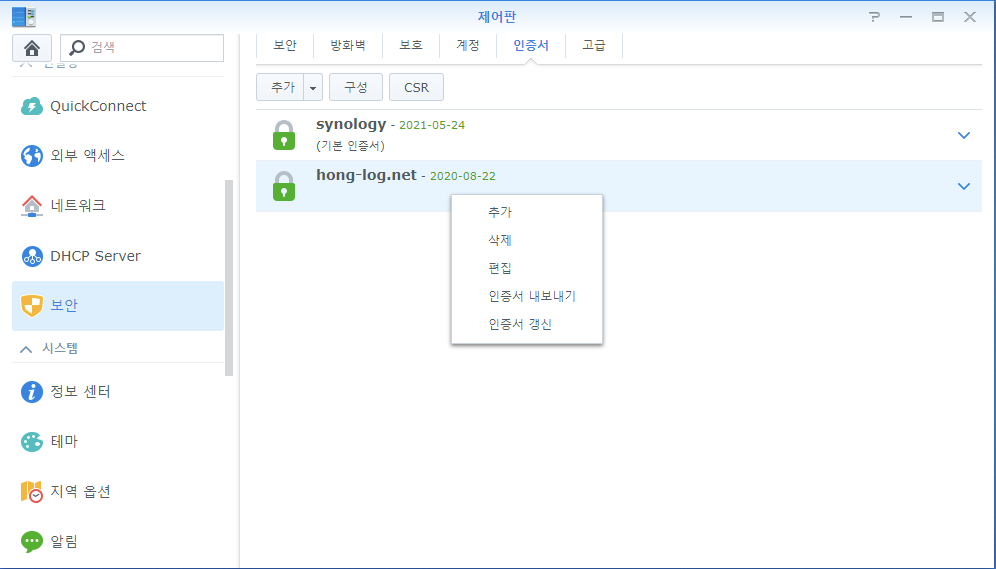
Right-click the Let’s Encrypt certificate you issued in the Certificates tab, and you’ll see the option to renew the certificate immediately.
Additionally, the Certificates tab shows the remaining validity period in green text, making it very convenient to monitor.
Moreover, if you keep the ports for the United States open in your firewall, the certificates will automatically renew without any manual intervention, making it even more convenient.
If you have been unable to resolve the Let’s Encrypt certificate issuance issue on Xpenology by any other means, I hope this guide has helped you resolve it.